27/05/2009
Bartione guitar BA001: update
I have started drawing the plan: the body and neck are coming into being. I have however changed the plan to adapt the Selmer-shape with a Gretsch-style cutaway; it would leave a small, awkward bout to fit the volume control button. So I will stick to the traditional Selmer-cutaway, a shape of which I am pretty satisfied. In a few days time I will add enough detail to the drawing to start working on the actual body. That will be made of 'masonite', a MDF (Medium Density Fiberboard) press-glued wood material as used by the Danelectro company. It provides enough sustain and dark tonality for a twangy baritone, I am told... We'll see, if not satisfactory I can still put the bolt-on neck and hardware on a real wooden body later...
25/05/2009
Preparations of the baritone guitar have started


Started work on my electric baritone guitar yesterday; I am currently drawing the build plan by hand and meanwhile determining some of the specifications. It wil be a 6-string full-body electric, with a string length (scale) of 29 inch or 736.6 millimeters. The body shape is of course taken from the Maccaferri-Selmer guitar, but I'm going to change the cutaway somewhat to resemble that of a Gretsch. The headstock will be loosely inspired by Guild.
This baritone will be tuned C-c. The hardware is as yet not determined (tuners, bridge, tremolo) but I have already made preparations to install hand-wound pickups by Steffsen ( www.steffsen.be ). The coming weeks you will be able to follow progress on this very interesting project here; to me it's very interesting because a baritone guitar is very different in stringing, setup, tuning... Hopefully I will encounter some minor problems that will be very educational!
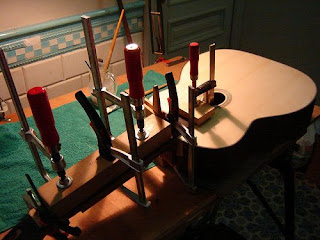
Here are some pictures of my workshop and the drawing table...
22/05/2009
21/05/2009
Videos about constructing this guitar
I have made 3 slide show videos of several pictures taken during the process of building the Selmer SE001 guitar. They give an insight of different steps of construction and are set to some fine music played on a similar guitar.
Watch them on YouTube following these links or the ones below on this blog page:
the first video: http://www.youtube.com/watch?v=hDKT01jatSA&feature=channel
the second video: http://www.youtube.com/watch?v=X9KqvkF_NR8&feature=channel_page
the third video: http://www.youtube.com/watch?v=HyietqSU-IM
06/05/2009
The Selmer SE001 (14)


In the meanwhile I made a Rio rosewood bridge. Some of the frets had to be refretted, I made a new and better nut from bone, placed position dots on the top side of the fretboard (visible only to the player) and finished some touches here and there... Then I applied French polishing to the guitar. Now it was completely finished!
I experimented somewhat with different strings; the standard Savarez Argentine .010 I found a little light. D'Addario has a special set for gypsy guitars but it's a bit dull and without expression, I think. Currently the guitar is stringed with Galli Django strings, a bit thicker than the Savarez but very clear and projective just as well!
Here are som pictures of the finished guitar as it is now. In the future I would like to make the neck a bit thinner, more slender. But for now, she's happy as she is. Recently, the guitar has been played by Andreas Öberg, Ari-Jukko Loumaranta, Yorgui & Gigi Loeffler, Mozes Rosenberg, Jokke Schreurs and Popy Basily. They all agreed somewhat: it's a characteristic gypsy all right, but the neck is a bit thick and because of that she works a bit stiff for the left hand. But those things can be arranged, things can only get better!
The Selmer SE001 (12)
04/05/2009
The Selmer SE001 (11)
The Selmer SE001 (10)
Subscribe to:
Posts (Atom)


